Hey are you confused about how to connect your Godaddy domain to your webhosting and not getting answer to your question.
Don't worry I am there to fix this for you.
I have explained it in very easy step by step process you can follow.
After completing the steps you can connect your Godaddy domain to your hosting account.
Every business need its own domain name and web hosting without connecting these two you will be not able to run your business.
Some of the beginners when they register their brand domain and also took a web hosting but the problem is they don't know how to connect these two.
So, lets get started.
Before setting up these two make sure you have made all the necessary setting in order to avoid interruptions.
How you can connect your domain name to your hosting account
Below is a simple steps you can follow,
- First signin to your Godaddy account.
- Go to my products & click on manage.
- Next Go for Manage connection > Manage DNS.
- Search for name server below.
- Click on Change > select Custom.
- Enter your name server & click save.
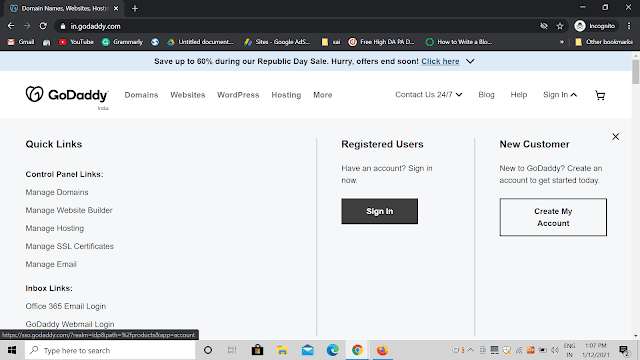
Step 1: Signin to Godaddy.
So the first step you need to signin to your godaddy account with your username and password.
And click on signin button.
STEP 2: Go to my products
But you have to select the domain name for whom you want to connect to web hosting.
On the right side of domain name you can see manage option just click on it.
STEP 3: Go to Manage connections > Manage DNS
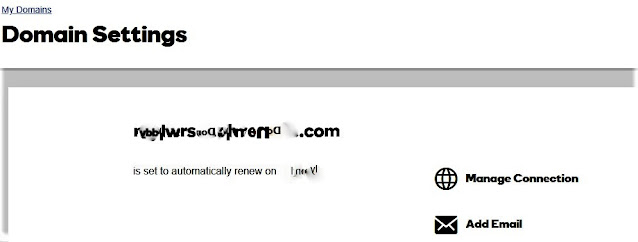
When you click on manage button now you have click on manage connections and it will opens up like below interface.
In the above field you can check your domain last expiry dates and when you have make renewal of your domain.
When you go through manage connection now you see below manage DNS option. Now click on Manage DNS and you will directly directed to DNS management.
STEP 4: Search for NAMESERVER
Scroll down below until you find NAME SERVER menu and you can find it at bottom of page sometimes.
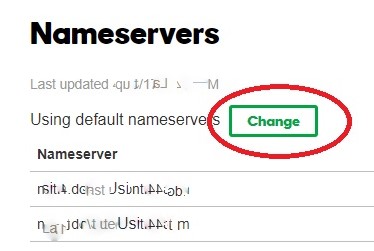
STEP 5: Click on change in nameserver.
From the above image you can find the change option which is available at right side.
Now you have to change the default setting from default server type to custom. You can do this by choosing the custom option.
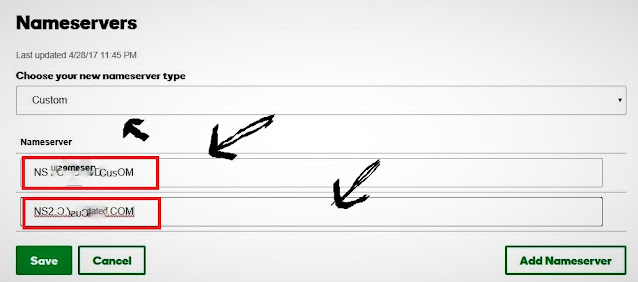
STEP 6: Add your nameservers and save it.
After choosing custom server type now you have to add your name servers in the below boxes.
Name servers and sent to your e-mail address when you buy your web hosting package. After making successful transaction within 5-10 minutes your login URL NAMESERVERS etc, are sent by webhosting provider.
When I purchased hosting from A2hosting they immediately sent me nameservers with 5 minutes so I like them much and trust them.
Nameservers starts with NS1, NS2 etc.
After adding your name servers click on save button and your work is finished.
Just keep relaxed, to connect your domain to hosting server it may take time up to 48 hours.
So like this you can connect your Godaddy domain to your website within few minutes and its also easy process.
Sharing with you friends who are confused about this topic.
I hope you got value from my article and helped you a lot.
Thank you.


0 Comments